


How to send a message to your class
If you are an active Tutor you can send email messages to your class. But first you need to allow pmhu3a.org.au to open pop ups in the browser of your choice. You only need to make this change once for the web browser that you use on your PC, smart phone or tablet. This is not something PMHU3A can do for you. Precisely how you make that change will depend on the browser that you use. You will need to follow the instructions below.
You need to add this text - https://pmhu3a.org.au - to allow you to send mail to your class.
For example, with the Edge browser:

Use the link below for an explanation with your chosen browser.
- How to allow pop-up for PMHU3A in Microsoft Edge
- How to allow pop-up for PMHU3A in Chrome
- How to allow pop-up for PMHU3A in Firefox
- How to allow pop-up for PMHU3A in Safari
Log on to UMAS
Then, once you have set your browser to allow pop ups you need to log on to UMAS. You can do that using this menu item from our main site.
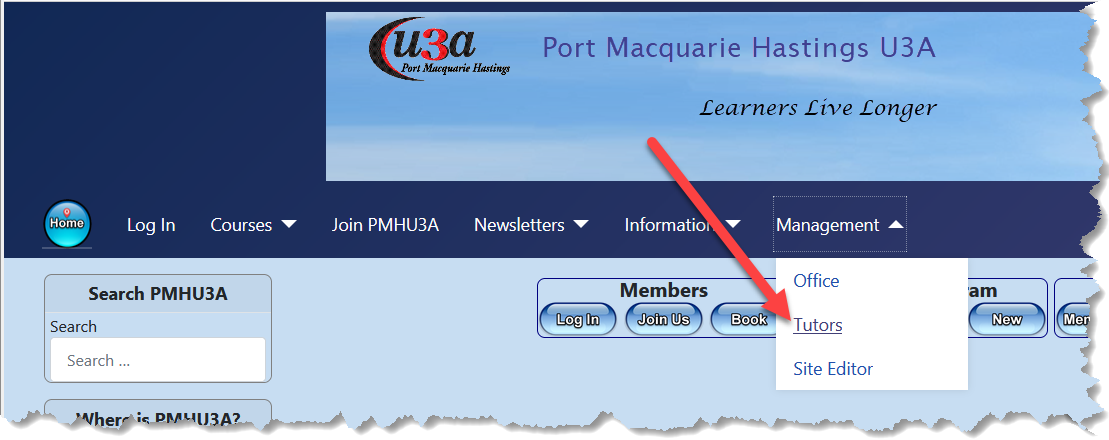
Then log on to UMAS

Go to Send Emails
Now, once you have logged in, click on 'Send Emails'.

Check Browser & Start Email
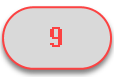
If you see this screen you have not set your browser to allow pop ups.

You need to allow pop ups as explained here.
When you have logged in having resolved any pop up problems, click on the Enrolments tab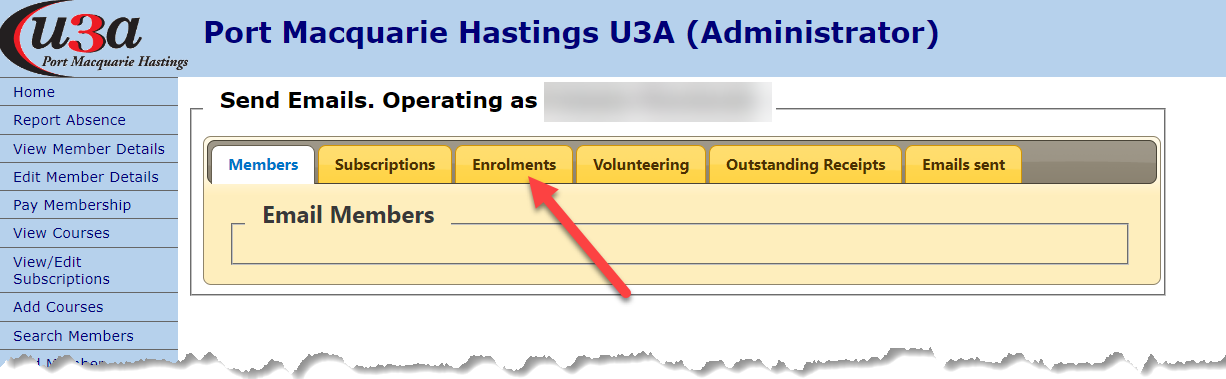
Prepare & Send Your Message
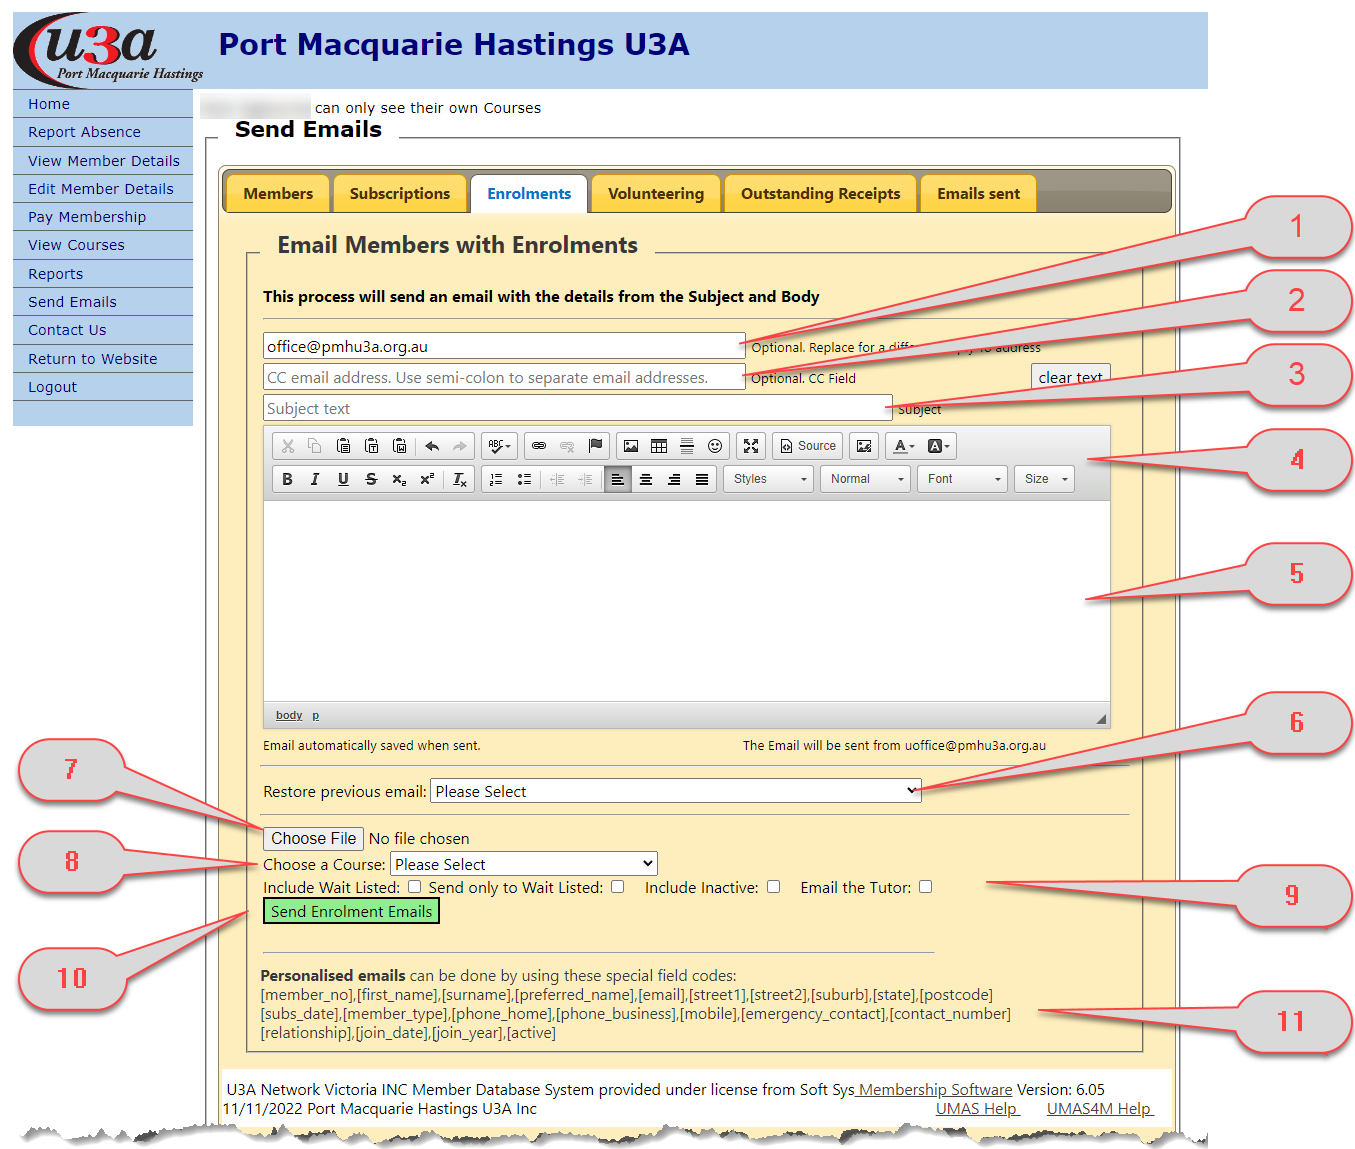
 By default any replies to your message will be sent to the office. You must change that to your own email address.
 Use this field to add email addresses of people who are not in your class. For example if you want the office to be able to respond to member queries to this message, include
 You must include a subject for your message here. It is compulsory.
 Use these buttons to format your message. You probably won't find it necessary since most buttons are similar to other editors such as Word but you can find a detailed explanation of the editor -JCE here.
 Include your message text here
 You can use this button to restore a copy of a message that you have sent in the past. Use it to repeat a message or as a model for a new message.
 Use this button to attach a file or files to your message. You can only send certain types of files.
-
-
- MS Word files (type doc or docx)
- MS Excel files (type xls or xlsx)
- Adobe Acrobat files (type pdf)
- Image files (types gif, jpg, jpeg, bmp or png)
-
 Use drop down control to pick the course to which you want to send the message

 You can send the message to the class or subsets as you wish by clicking some or all of these check boxes.
-
-
- Include Wait Listed
Your course may have members waiting for a vacancy. Check this box to include those members. - Send only to Wait Listed
Similarly, check just this box to send a message only to those members who are wait listed. - Include Inactive
Particularly at the end of the year, some members may be booked on your course before they have renewed their membership. You should check this box to include all members who have booked on your course. - Email the Tutor
Check this box to include a copy of the message to all of the class tutors.
- Include Wait Listed
-
As a default, to make sure all members booked on or waiting for a place on your course receive a copy of your message, check these boxes.

 When you are ready, click this button to send the message. If you have anything wrong - invalid file type or missing subject - then you will be warned and need to return and fix the error.
 Personalised Emails. You can use any of these codes to personalise your message. The text must be exactly as shown and must be enclosed in [].
|
For example Dear [preferred_name] and how are things today at your home at [street1],[suburb]. Just checking that your phone number is [phone_home] and mobile [mobile]. |
And when you are ready click the [Send Enrolment Emails] button
Sending your message
You should receive this confirmation message that lists the selections that you have made.
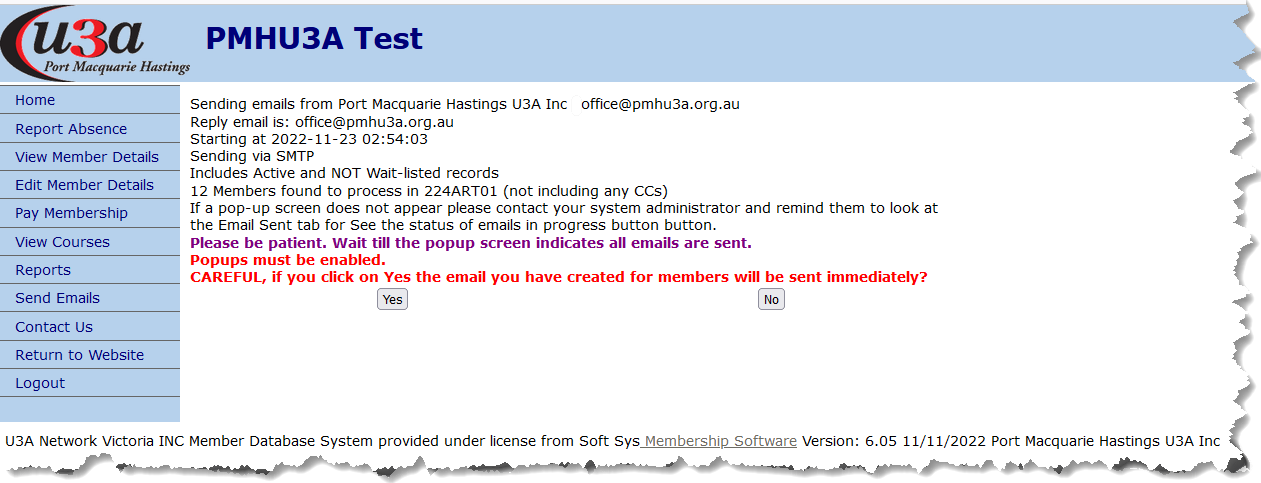
Check that the messages will be sent to those that you intended. Click Yes if OK or No if you want to make some alterations.
If you select Yes then this progress screen will appear.

You can watch progress on that screen which will finally show this screen reporting the final delivery state for your message. Check the list of email addresses. Some members may not use email and won't receive your message. They will have an email address of
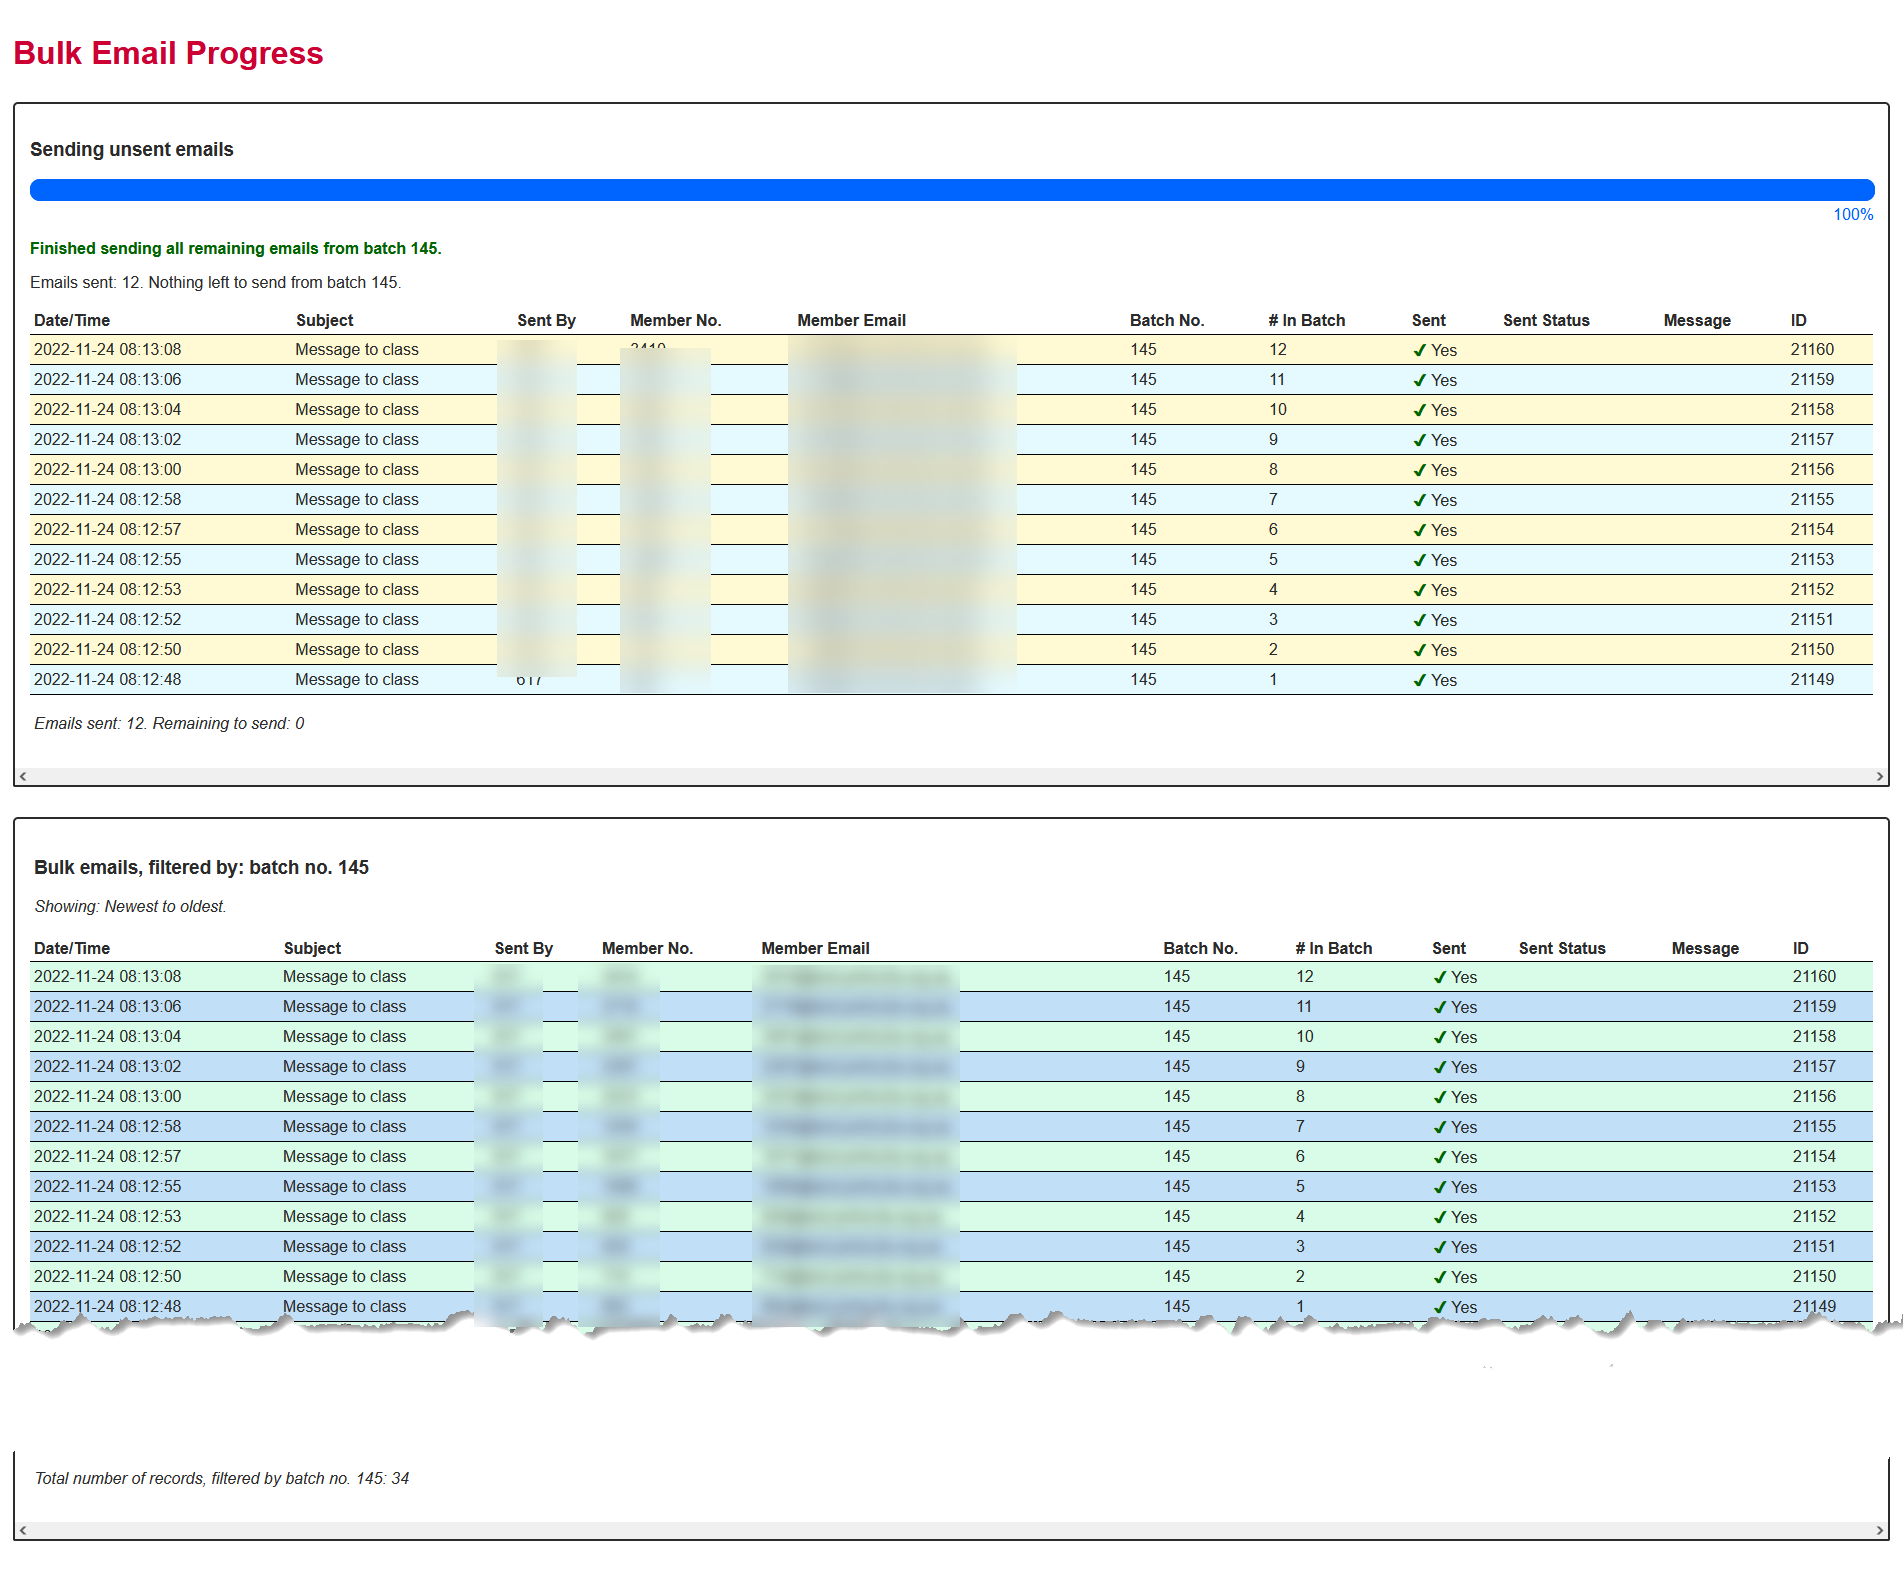
That might take a while depending on how many messages you send and the size of your message plus any attached files.
Remember that this pop up screen will remain open on your PC, tablet or smart phone. You will need to close it and come back to the UMAS site.